Voor de Nederlandse versie click hier 🙂
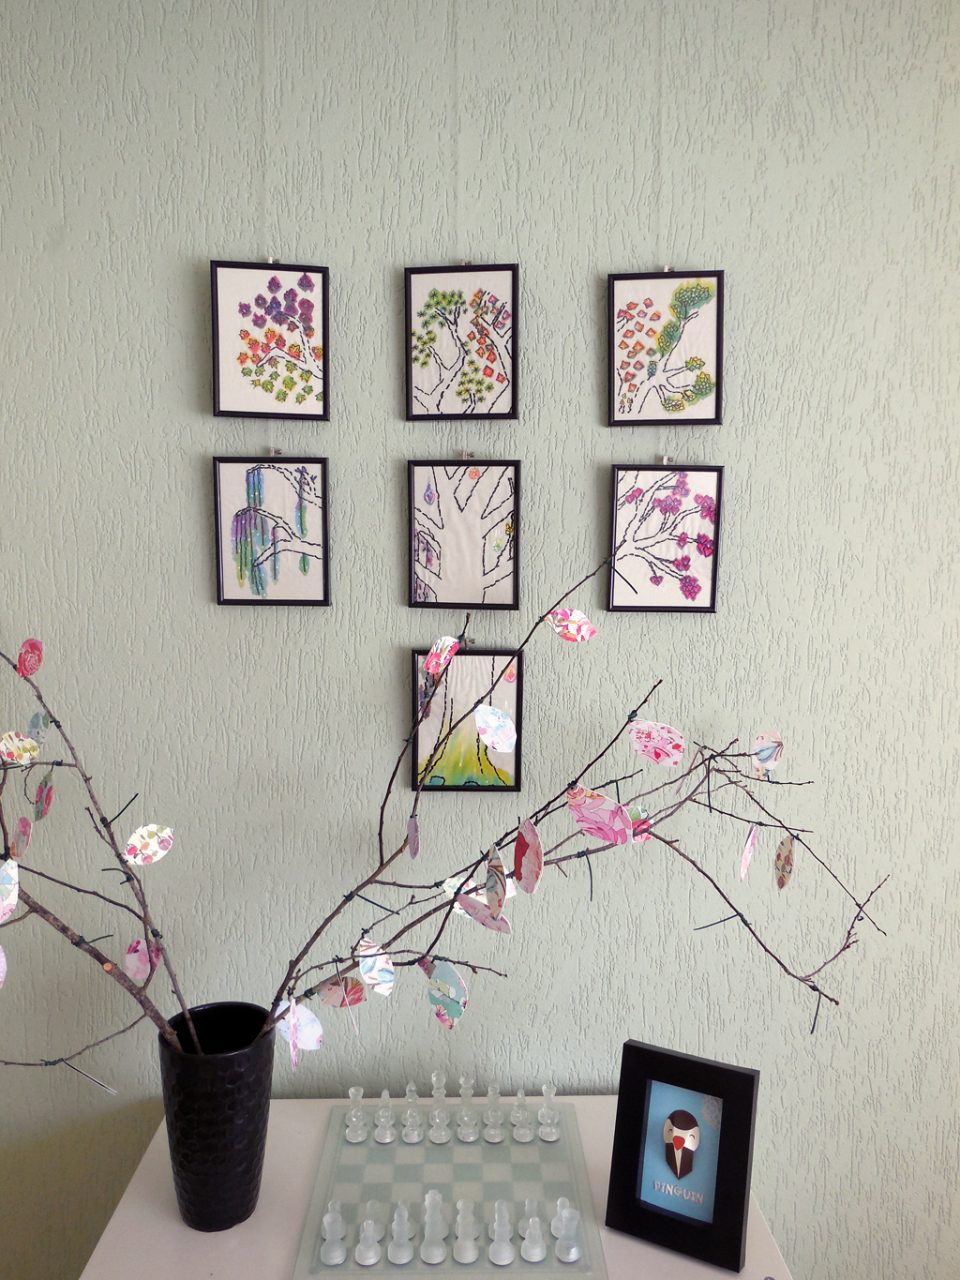
As promised the ’embroidery tree wall art how to’. pfew, that’s quite a mouthful! At least there can’t be any confusion about what this is 🙂
First things first. Let’s talk about what you need.
What you need
for the drawing part:
– pencil and paper for drawing your tree
OR
– a large photocopier and a tree if you are truly dedicated to realism 😉
– tracing paper
for the embroidery part:
– unbleached cotton fabric. Scraps are fine, as long as they are big enough to fit into your frames
– embroidery silk in black, or any other color you like to embroider the leafs and tree shape
– embroidery hoop, needle and clippers
for the watercolor part:
– watercolor ink, I used ecoline in red, blue and yellow
– white fabric paint to highlight some areas (optional)
-a set of paint brushes
– three cups of water, one for each color and an additional one with water that you leave clean.
– old newspaper to protect your surface
Other:
– seven photo frames of the same size and look for a uniform appearance
– rotary cutter, quilt ruler and cutting mat for cutting out the frames (or scissors and a ruler)
– iron, board and pressing cloth
– time, patience and love 🙂
Step one: Drawing the tree
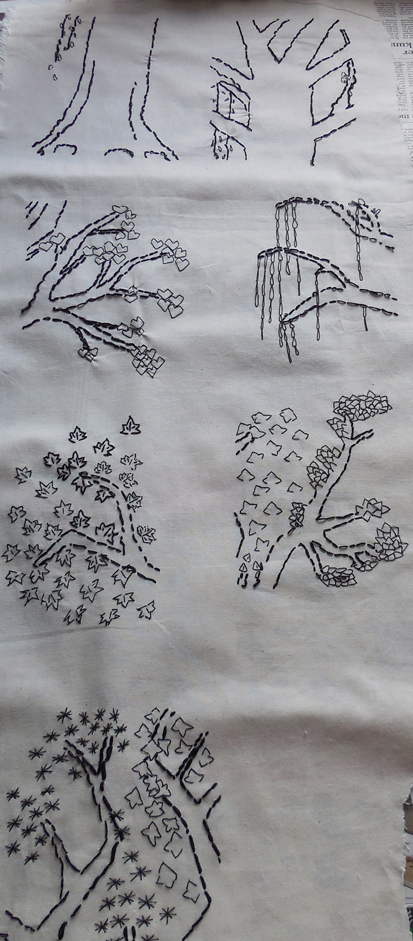
1.1 Determine the size of your photo frames. Make a grid to line out each separate frame. The grid will be made out of 2×3 spaces below each other and one at the bottom (see top picture)
1.2 Draw your tree within the spaces. Think about what kind of leafs you want and where you want them. I didn’t embroider leafs over paper to trace them, because the leafs are so fine that it’s more neat to do without.
1.3 Trace each individual frame onto tracing paper.
1.4 Cut out the tracing paper frames to place over your fabric.
Step two: Embroidering the tree
note: I left my fabric in one piece until the last moment when it was time to frame. This way I could never loose any of the fabric frames, and the embroidery hoop would always fit.
2.1 Put a tracing paper frame onto your fabric and secure it with your embroidery hoop.
2.2 With a back stitch and 4 threads of embroidery silk; trace all the lines of your tree. Rip away the paper as you go.
2.3 with any stitch you like and 1 thread of embroidery silk; embroider the leafs all around your tree like you imagined. I used open and closed chain stitches mostly.
Step three: Time for magic
Note: before you color the ‘real deal’, you might want to practice what the ink does on a scrap piece of fabric.
3.1 Assemble all your watercolor stuff, making sure to cover up your work surface. This watercolor ink will not come off!
3.2 For a nice watercolor look; Put a clean brush in water and soak it wet. Put the brush on areas you want to color. Let it sit for a little while so the fabric can get truly wet. The more wet it gets, the more the watercolor will pool. If you do not wet the fabric, it will look like any other paint.
3.3 with the colors of your liking, start coloring your leafs. Dip a brush in the ink, so only the top is submerged. Place the tip on the fabric on the place where you want the most color and wait until the magic happens!
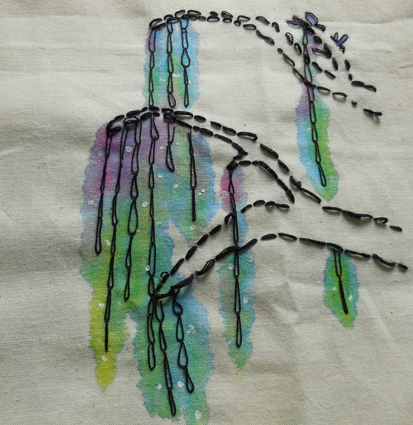
3.4 When you are done painting, let it dry completely.
3.5 If you want highlights, you need to wait until the ink is completely dry.
Step four: Assembly
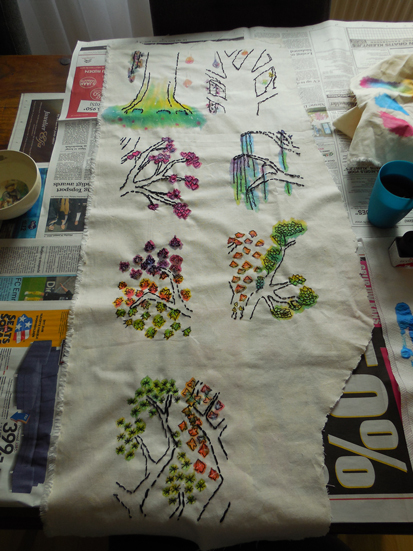
4.1 Cut out all your fabric frames in the size of the photo frames.
4.2 Iron the back of your frames on medium heat with a cloth in between.
4.3 Put the fabric frames in the photo frames, making sure all sits well and straight.
4.4 Hang your frames on the wall. I used a rail system that will allow me to hang frames from cables, so I don’t have to drill seven holes. I found it in my local hardware store, so I’m not sure if it’s available worldwide.
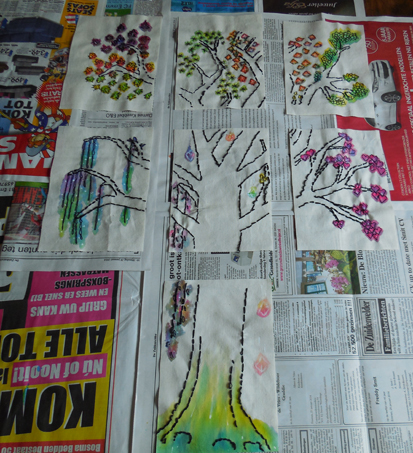
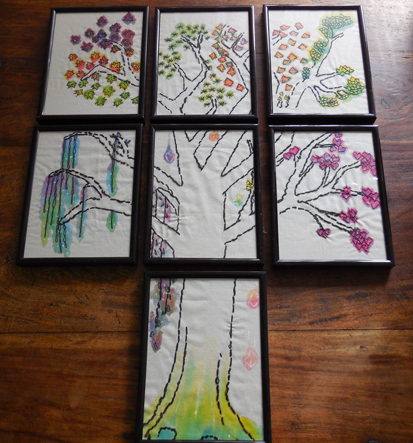
Admire your beautiful wall art!
If you have any questions or remarks, feel free to send an email to: aspoonfulofyarn@hotmail.com or use the contact form.
I would love to see pictures of your finished wall art. You can send them to me via above email adress, the aspoonfulofyarn facebook page or tag my instagram: @xxkurisuxx.
Happy making 🙂
copyright
All patterns are for unlimited personal use. Do not reproduce, sell or publish (parts of) the patterns. Patterns may not be copied in any way (print or digitally), in part or in full, except for personal use. Items may be sold that are made from this pattern as long as the designer is credited.
Discover more from A Spoonful of Yarn
Subscribe to get the latest posts to your email.
5 Comments
Comments are closed.

This is thee most beautiful embroidery, leaf, &/or tree DIY project i have EVER seen! Once the stitchings done, i can even invite the children to take part in some seriously cool art! Plus the value of its prescense as a display–priceless! This is so well thought out & handcrafted. Thank you kindly for sharing. Pinned & following your blog ;D
Thank you jeanine:) yes, you can totally do this with kids too! Hadn’t crossed my mind, that’s really clever!
Love
Kurisu
This is so pretty!
Thank you, that’s so nice to hear 🙂
Very cool! I really like embroidery, event hough I haven’t done any in a couple years. I really wish we could put additional holes in our walls! I’ll have to save this idea for when we move next year. Pinning!