Voor de Nederlandse versie klik hier
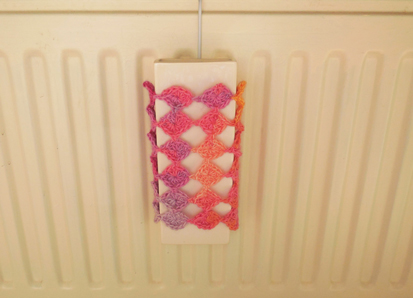
I don’t know a lot of people who have humidifiers hanging on their radiators. The electric ones I also don’t see very often. I think they are practical, but not really appealing to look at. They tend to clunk to my radiator every time I close the back door. All in all they are boring. However, they are good for your plants and good for you, because more humid air causes for less dust and happy plants.
Because of the clunking noise the humidifier made and because I wanted to make the humidifier more pleasing to look at, I made a cozy.
I wanted to make something with circles, because they are really simple and it was, for me, a little bit of a challenge, using circles instead of squares. The obvious thing to do, was to make a granny square cozy, but how many tutorials are there, of those nostalgic retro squares. This tutorial is very simple and quick, and by the end of the making, you will see the endless possibilities this tutorial will offer 🙂
You will need:
– A 3 mm crochet hook
– some scrap yarn
– a darning needle for weaving in ends
– thread clippers
Techniques:
– magic loop (you can find many videos and how-to’s on the web)
– Join as you go. This method will be explained
– Single Crochet (SC)
– Double Crochet (DC)
Gauge:
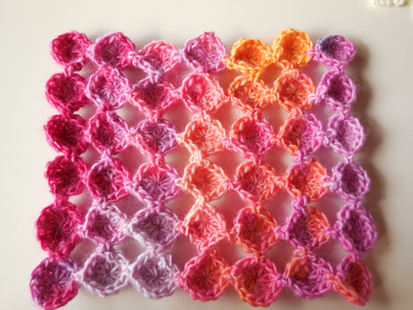
One circle is 2,5 cm (1 inch) in diameter. My cozy measures 20 cm (8 inch) around and 15 cm (5 9/10 inch) high. I made a rectangle of 6 circles high and 7 circles wide.
Notes:
This tutorial uses US terms.
Instead of the magic loop you can do a -chain 2, work in second chain from hook- as a substitute
Let’s get crackin’
Step 1
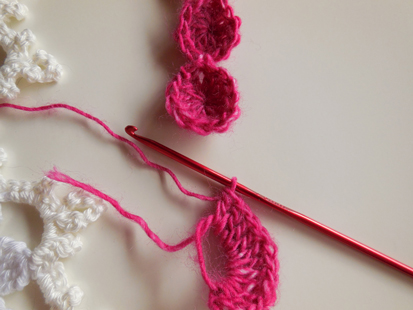
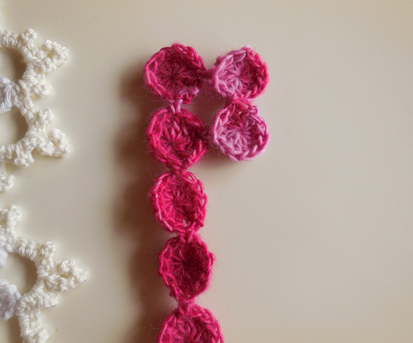
For the first circle:
with a magic loop: chain 3, ( this counts as your first double crochet) DC 11 in the loop. Pull the magic loop so you make a circle and join the last stitch in the top of the chain 3 to close it. Cut off your yarn and weave in the ends.
Step 2
For the second circle (first join):
Repeat step 1 up to the point that you join the circle together. Insert your hook into any stitch of the other circle you’ve made in step 1 making sure the wrong sides of the circles are together. Make a Single Crochet (SC) to join the two circles together. Now you continue to finish the circle as in step 1.
Step 3
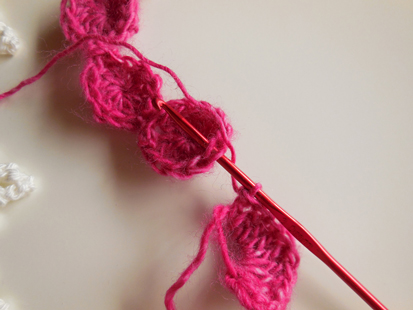
For the third to sixth circle joins:
Repeat step 1 up to the point that you join the circle together. Insert your hook into the sixth stitch from your previous joining point. Make a SC to join the circles together. Continue to finish the circle as in step 1.
With the first row done, it is time for the second row.
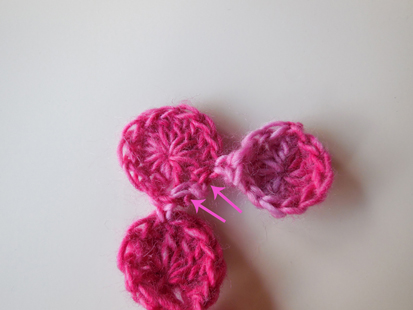
With a magic loop: chain 3, DC 3. Join in the side of the top circle in the third stitch from the bottom join. Finish circle as in step 1. The arrows indicate how to count the stitches.
Step 5
For the second circle in the next row, you need to join your circle in the top and in the side.
Repeat step 4 to join your circle into the top circle, but don’t finish it yet. DC 3 more and repeat step 4 once more. This time you do finish your circle.
Repeat step 4 and 5 until you have a rectangle that’s 6 circles high and 7 circles wide. It should measure 20 cm (8 inch) wide and 15 cm ( 5 9/10 inch) high.
Closing the sides:
Fold your piece in half length wise with the right sides together.
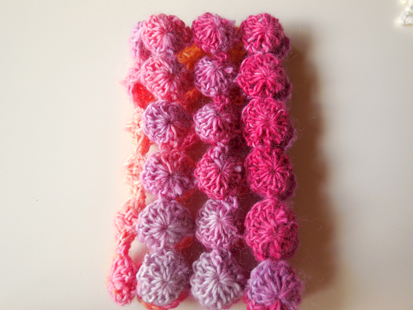
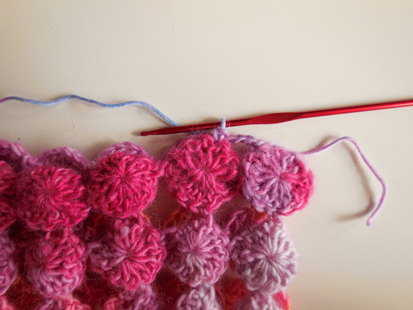
Begin with a slip knot on your hook; *SC 3 (beginning in the third stitch from the left side join), ch 3* repeat to end, ending with SC 3.
Now all you have to do is cut your yarn and weave in the last ends!
Now you can enjoy a pretty piece of crochet hanging from your radiator ^^